 Deutsche Version
Tualatin in the Asus P3B-F
Or: How to run the Intel Tualatin PIII / Celeron in a modern BX board.
Original: October 6 2002, English translation: March 2003 / Mathias Rufer
Warning: This manual is intended for technical experienced people. Use at your own risk!
Contents
Preface
The Asus P3B-F mainboard with Intel 440 BX chipset is without any doubt the best mainboard I ever bought. In my opinion, the BX chipset is the best, fastest and most stable Pentium III chipset of all times.
When Intel switched from the Pentium III "Coppermine" familiy to the new 0.13µm PIII "Tualatin", not only the core voltages but also the voltage of the AGLT bus and the pinout changed slightly. It looked like fate treated all older PIII mainboards unkindly. And with the good old mainboards, the PIII seemed to become uninteresting, because I never liked these fancy Intel 8xx chipsets.
When PowerLeap brought their PL-iP3/T Slot1-FCPGA adaptor to the market, there was suddenly hope again. Running the Tualatin in BX boards!! Well, because the adaptor is much too expensive, this is not an option. Thanks to some ingenious people from Asia, it is now possible to run the Tualatin without an expensive adaptor in modern BX boards.
 |
Contents |
Sources
- "Tualatin In A BX
Board", James Anderson, www.overclockers.com - 02/04/30
- Thread
in the MadOnion forum, started by "catch22atplay". Refers to "nightcat" from Taiwan.
- Thread
in the Overclockers forum, started by "soil". Refers to Chinese pages.
- Datasheets from Intel:
243658-019: Intel® Celeron® Processor up to 1.10 GHz
298596-001: Intel® Celeron® Processor for the PGA370 Socket at 1.20 GHz on 0.13 micron process Datasheet
245335-006: VRM 8.4 DC-DC Converter Design Guidelines
249659-002: VRM 8.5 DC-DC Converter Design Guidelines
|
Contents |
PC hardware
The modification should be possible with every Slot1/S370 mainboard that complies with Intel VRM 8.4 specification and that has an up to date or tolerant BIOS. The choice of the slotket is very important. The slotkets MSI 6905 and Asus S370-DL are suitable. These contain the chip "TVC16222A"and provide the possibility to adjust the core voltage. It's well possible that other slotkets run aswell. Try and error!
I used the following hardware:
- Asus P3B-F revision 1.04
- MSI MS-6905 Master rev 2.3 Slot1-FCPGA Adapter ("Slotket").
- Intel Tualatin Celeron 1.4GHz. 1400/256/100/1.5V Philippines, SL68G (stepping 06B1)
|
Contents |
PC software
The modification of the BIOS is not mandatory and probably not possible for all BIOS types. In my case it was easy to put the more recent microcode updates from another Asus mainboard into the BIOS.
Caution: The listed software is specific for exactly this mainboard and only for this stepping of the CPU!
Hint: Google finds the download link for cbrom.
- Award cbrom 2.15 (Caution on versions: cbrom 2.15 replaces both cbrom 1.x and cbrom 6.x)
- ctmc15 Tool to read out, display and flash microcode updates. ct, Magazin für Computer Technik (German computer magazine)
- 1008f3.004
Beta BIOS for Asus P3B-F
- 1014b.003
Beta BIOS for Asus P2B (includes microcode updates up to CPUID 06B1)
- aflash Asus Flash tool, for P3B-F. Get it from your mainboard CD or from ftp.asuscom.de
|
Contents |
Tools / material

- Soldering iron with very fine tip. Appropriate tin-solder.
- Small side cutter
- Pin
- Isolation of a thin wire. Outer diameter about 0.8mm. Alternate idea: Lead of an IDE cable
This isolation will be put over the pins of the processor. It mustn't be too thick because it still has to fit into the ZIF socket (shouldn't be stuck there).
- Thin, insulated wire. I took a winding of an electric motor.
- Felt pen to mark the right pins on the processor
- Swiss Army Knife (it's very important that this is a genuine Swiss Army Knife ;-)).
Will be used to open the ZIF socket.
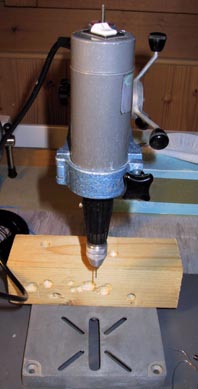
- (on the right) Small drilling machine with 1mm drill.
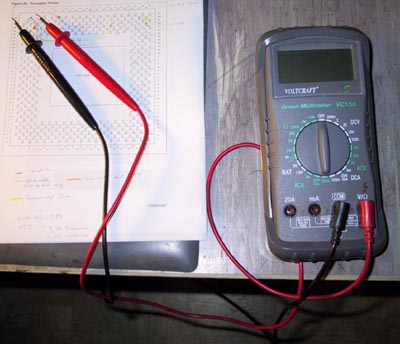
- (below) Digital multimeter
 |
Without picture:
- 1k ohm resistor, as small as possible, power not important.
- shrinkdown plastic tubing
- adhesive tape
- magnifying glass
- maybe: nail lacquer and fine brush
- a steady hand :-)
|
|
Contents |
 |
Page 2: The conversion |